
wooden tool chest plans free pdf
Building a wooden tool chest is an excellent project for woodworkers of all skill levels, offering free PDF plans to enhance your woodworking skills․ It provides a customizable storage solution, helping keep tools organized while showcasing your craftsmanship․ Perfect for both beginners and experienced craftsmen․
Overview of Tool Chest Benefits
A wooden tool chest offers excellent organization, keeping tools tidy and easily accessible․ It protects equipment from dust and damage, extending their lifespan․ Portability is another key advantage, allowing you to move tools effortlessly between jobs․ A well-crafted chest also enhances workshop aesthetics, adding a touch of professionalism․ Additionally, building one can be a rewarding DIY project, providing a sense of accomplishment and cost savings compared to commercial options․ It’s a practical and functional addition to any workspace․
Importance of Customizable Plans
Customizable plans for wooden tool chests ensure your project fits your specific needs, optimizing storage and workflow․ They allow you to tailor size, layout, and features to your tools and workspace․ This personalization enhances functionality and aesthetics, making the chest more practical and visually appealing․ With free PDF plans, you can adapt designs to suit your skill level and material preferences, ensuring a project that is both challenging and rewarding․ This flexibility makes customizable plans invaluable for woodworkers seeking unique solutions․
Materials and Tools Required
Building a wooden tool chest requires durable wood, hinges, handles, and hardware․ Essential tools include saws, drills, sanders, and fasteners to ensure a sturdy and functional design․
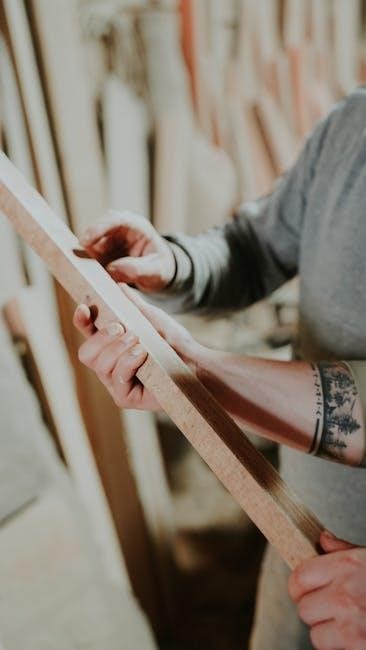
Wood Selection for Durability
Choosing the right wood is crucial for a long-lasting tool chest․ Opt for durable materials like Baltic birch plywood or solid hardwoods such as maple or oak․ These woods offer strength and resistance to wear and tear․ Ensure the wood is properly sealed with a protective finish to enhance durability and protect against moisture․ Using high-quality lumber guarantees a sturdy and reliable storage solution for your tools․
Essential Hardware and Fasteners
High-quality hardware is vital for a functional and durable tool chest․ Use sturdy hinges, drawer slides, and handles to ensure smooth operation and longevity․ Ball-bearing drawer slides provide effortless access, while recessed handles offer a secure grip․ Durable fasteners like screws and bolts are essential for assembling the frame and drawers․ Choose rust-resistant options to protect against moisture and wear․ Proper hardware selection ensures your tool chest remains reliable and easy to use for years to come․
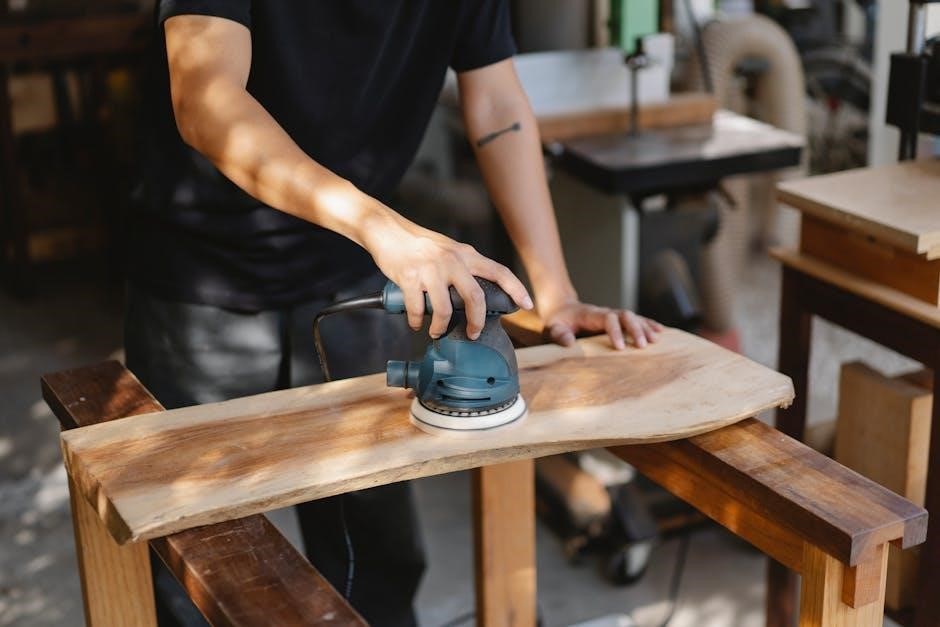
Basic Woodworking Tools Needed
To build a wooden tool chest, you’ll need essential woodworking tools like a circular saw, hand saw, or jigsaw for cutting wood․ A drill press or hand drill is necessary for precise holes, while sanders ensure smooth surfaces․ Measuring tools, such as tape measures and squares, are crucial for accuracy․ Clamps will help hold pieces steady during assembly․ Basic hand tools like hammers, screwdrivers, and chisels are also required․ Having these tools ensures a efficient and professional-looking project outcome․
Design Considerations
Designing a wooden tool chest involves evaluating size, layout, and drawer organization to maximize storage efficiency while balancing aesthetic appeal with functional practicality for workshop use․
Size and Layout Options
Choosing the right size and layout for your wooden tool chest is crucial for functionality․ Consider the number of tools you own, available workspace, and portability needs․ Compact chests are ideal for small workshops, while larger designs offer ample storage for extensive tool collections․ Layout options include single compartments, multi-drawer systems, or a combination of open and enclosed spaces․ Adjustable dividers and customizable drawer configurations allow tailored organization․ Ensure your design balances accessibility with space efficiency, keeping frequently used tools within easy reach while maintaining a tidy workspace․ Opt for materials like Baltic birch plywood for durability and a smooth finish․
Drawer and Compartment Organization
Effective drawer and compartment organization maximizes storage efficiency in your wooden tool chest․ Incorporate adjustable dividers to separate tools, ensuring each item has a dedicated space․ Consider adding small compartments for screws, nails, and bits, while larger drawers can accommodate power tools․ A sliding inner till provides easy access to frequently used items․ Customize the layout based on your tool collection, ensuring everything is neatly arranged and easy to find; This thoughtful organization enhances productivity and protects your tools from damage․
Aesthetic and Functional Features
A well-designed wooden tool chest combines aesthetics with functionality, featuring elements like dovetail joints for durability and a sliding inner till for easy access․ Add a personal touch with custom finishes, such as stains or paints, to enhance the visual appeal․ Incorporate metal accents or intricate carvings for a unique look․ Smooth-gliding drawers and secure closures ensure practicality, while the overall design maintains a timeless, professional appearance․ These features make the tool chest both a functional workshop essential and a beautiful piece of craftsmanship․

Construction Steps
Building a wooden tool chest involves constructing the frame and base, assembling drawers, and attaching the lid and handles․ Follow detailed plans for a sturdy, functional design․
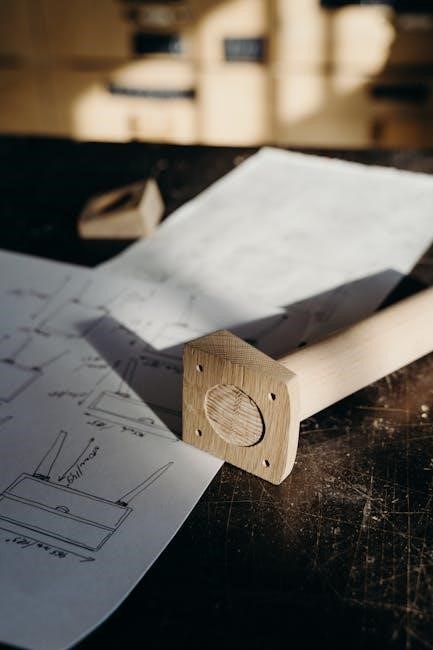
Building the Frame and Base
Start by cutting and assembling the frame using durable wood like Baltic birch plywood․ Measure and cut the sides, then secure them with screws or nails․ Ensure the base is sturdy by attaching it firmly to the frame․ Sand all edges for a smooth finish․ Optional features like wheels or a lower shelf can enhance functionality․ Follow detailed plans to ensure precise alignment and stability, creating a solid foundation for your tool chest․
Assembling Drawers and Compartments
Assemble drawers by attaching sides and bottoms using dovetail joints or screws for durability․ Sand all surfaces for smooth operation․ Install drawer slides to ensure proper alignment and easy access․ For compartments, measure and cut dividers, securing them with nails or brackets․ Customize layouts by adding small trays or adjustable partitions․ Ensure all components fit snugly and function seamlessly․ Proper assembly enhances storage efficiency and keeps tools organized․ Follow detailed plans for precise measurements and alignment․
Attaching the Lid and Handles
Attach the lid securely to the chest using hinges for smooth operation․ Ensure proper alignment and flush fit for a professional look․ Install handles on the lid and sides, using durable hardware for weight distribution․ Sand edges for a polished finish․ Add a latch or lock for secure closure․ For enhanced aesthetics, apply paint or stain before assembly․ This step completes the tool chest, providing easy access and a sturdy, organized storage solution for your tools․
Free PDF Plans and Resources
Discover top websites offering free PDF plans for wooden tool chests, complete with step-by-step instructions․ Explore DIY forums, woodworking magazines, and blogs for customizable designs and guides․
Top Websites for Free Downloads
Find free PDF plans for wooden tool chests on websites like ToolCrib, Woodsmith Magazine, and The Wood Knight․ These sites offer detailed designs, from simple to complex, ensuring you find the perfect fit for your workshop․ Many plans include step-by-step instructions, materials lists, and advanced features like sliding tills or dovetail joints․ Perfect for woodworkers of all skill levels, these resources help you create a functional and stylish tool chest․
DIY Forums and Communities
Join DIY forums and woodworking communities like Reddit’s r/woodworking, Woodworking Talk, and DIY forums for access to free wooden tool chest plans․ These platforms offer user-shared designs, tips, and support․ Members often post detailed PDF plans, step-by-step guides, and troubleshooting advice․ Engage with fellow woodworkers to refine your project and gain inspiration․ These communities are invaluable for beginners and experienced craftsmen alike, fostering collaboration and creativity in building functional and stylish tool chests․
Woodworking Magazines and Blogs
Woodworking magazines and blogs are excellent resources for finding free PDF plans for wooden tool chests․ Publications like Woodsmith Magazine and The Family Handyman often feature detailed project plans․ Blogs such as The Wood Whisperer and Woodworking Adventures provide step-by-step guides and tips․ These platforms cater to both beginners and experienced woodworkers, offering customizable designs and expert advice․ They are a great way to discover inspiration and refine your tool chest project with professional insights and creative ideas․

Advanced Techniques
Discover advanced techniques like adding a sliding inner till, incorporating dovetail joints, and custom finishing options to enhance functionality and aesthetics of your wooden tool chest․
Adding a Sliding Inner Till
A sliding inner till enhances your tool chest’s functionality, providing easy access to small tools․ It maximizes storage space and keeps items organized․ Customize the till’s size and compartments to fit your needs․ Use smooth-gliding hardware for effortless operation․ Ensure proper alignment during installation for optimal performance․ This feature is ideal for workshops requiring quick tool retrieval․ Detailed plans in free PDF guides offer step-by-step instructions for a professional finish․
Incorporating Dovetail Joints
Dovetail joints add exceptional strength and durability to your tool chest, ensuring long-lasting performance․ They provide a classic, professional finish and are resistant to wear․ Use hand-cut or machine-made dovetails for a traditional look․ These joints are ideal for drawer construction, offering secure storage for tools․ Free PDF plans often include detailed instructions for crafting precise dovetail joints, making them accessible for all skill levels․ This feature enhances both functionality and aesthetics of your wooden tool chest․
Custom Finishing Options
Custom finishing options allow you to personalize your tool chest, enhancing its durability and aesthetic appeal․ Choose from stains, paints, or natural oils to protect the wood and achieve your desired look․ Adding a clear sealant ensures long-term protection against moisture and wear․ Hardware selections, such as decorative handles, can also elevate the design․ Free PDF plans often include tips for applying finishes and selecting the perfect hardware to match your workshop style and tool organization needs․

Safety Tips and Best Practices
Always wear protective gear like gloves and safety glasses when cutting or assembling wood․ Ensure proper ventilation when staining or painting, and keep tools sharp to avoid accidents․ Maintain a clean workspace to prevent tripping hazards․ Follow woodworking safety guidelines and use clamps securely to hold pieces in place while working․ Regularly inspect tools for damage and store them safely in your tool chest․
Woodworking Safety Guidelines
Adhere to safety guidelines to prevent accidents while building your wooden tool chest․ Always wear protective gear, including safety glasses and gloves․ Ensure proper ventilation when staining or painting․ Keep tools sharp and store them safely to avoid injuries․ Regularly inspect tools for damage and maintain a clean, clutter-free workspace․ Use clamps securely to hold pieces in place, and never reach over moving blades or bits․ Follow manufacturer instructions for power tools and stay focused to minimize risks during the construction process;
Proper Tool Handling
Proper tool handling is crucial for safe and efficient woodworking․ Always use tools for their intended purpose and maintain them in good condition․ Keep blades and cutters sharp to prevent accidents and ensure precise cuts․ Store tools in a dry, secure location to avoid damage․ Use a firm, comfortable grip to maintain control, and avoid overreaching or stretching while operating power tools․ Regularly inspect tools for wear or damage, and replace parts as needed to ensure optimal performance and safety during your project․
Workshop Organization
A well-organized workshop is essential for efficiency and safety․ A wooden tool chest serves as a central storage unit, keeping tools secure and within easy reach․ By customizing your tool chest with compartments and drawers, you can maximize space and ensure everything has its place․ This not only prevents tool damage but also saves time when searching for items․ A neatly arranged workshop fosters productivity, reduces the risk of accidents, and enhances your overall woodworking experience, making it a worthwhile investment for any woodworker․
Project Tips and Tricks
Optimize storage by customizing compartments․ Personalize designs to fit your tool collection․ Troubleshoot common issues like drawer alignment for smooth operation and secure tool organization․
Optimizing Storage Space
Maximize your tool chest’s efficiency by incorporating adjustable compartments and dividers․ Use sliding trays or a till for easy access to frequently used tools․ Consider adding small bins for hardware like screws or nails․ Vertical space can be utilized with stackable drawers or shelves․ Ensure proper measurements to fit all tools neatly, avoiding wasted space․ Customize the layout based on your tool collection to create a functional and organized storage system․ Free PDF plans often include tips for optimizing space effectively․
Personalizing Your Design
Personalize your tool chest by adding unique touches like custom engravings or paint finishes․ Incorporate specific features such as sliding tills or adjustable compartments to suit your tool collection․ Consider adding dividers or small trays for organizers like wrenches or screwdrivers․ You can also customize the size, shape, and layout based on your workspace and preferences․ Free PDF plans often include customization tips, allowing you to create a tool chest that reflects your style and meets your specific needs․ This ensures functionality and a personal touch․
Troubleshooting Common Issues
Common issues when building a wooden tool chest include alignment problems with drawers or lids and uneven fitment of compartments․ To address these, use shims or sandpaper to adjust surfaces for a smooth fit․ Ensure all measurements are precise to avoid misalignment․ If drawers stick, check the runners and hinges for proper installation․ For warping wood, apply clamps or additional support during assembly․ Consulting free PDF plans and online guides can provide troubleshooting tips and solutions to ensure your project turns out perfectly․
Building a wooden tool chest is a rewarding project that enhances workshop organization and skill development․ With free PDF plans, craftsmen of all levels can create functional and personalized storage solutions, ensuring tools are protected and easily accessible․ This project offers a sense of accomplishment and practical utility for years to come․
Final Thoughts on Building a Tool Chest
Constructing a wooden tool chest is a fulfilling endeavor that enhances workshop organization and skill development․ It offers a practical storage solution while showcasing craftsmanship․ Whether you’re a novice or an experienced woodworker, free PDF plans provide a clear guide to creating a durable, personalized tool chest․ The process not only improves your woodworking abilities but also results in a functional piece that protects and organizes your tools, offering lasting utility and satisfaction․
Encouragement for Beginners
Building a wooden tool chest is a perfect project for beginners, offering a rewarding experience to enhance your woodworking skills․ With free PDF plans and step-by-step guides, you can confidently create a functional and durable storage solution․ Embrace the process, as it’s a great way to improve your craftsmanship while organizing your tools․ Don’t hesitate to start—this project is both enjoyable and fulfilling, providing a sense of accomplishment and a practical piece for your workshop․